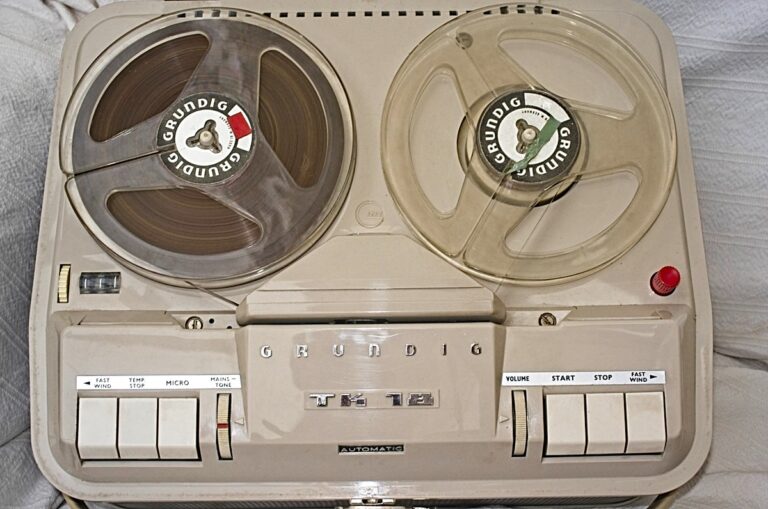
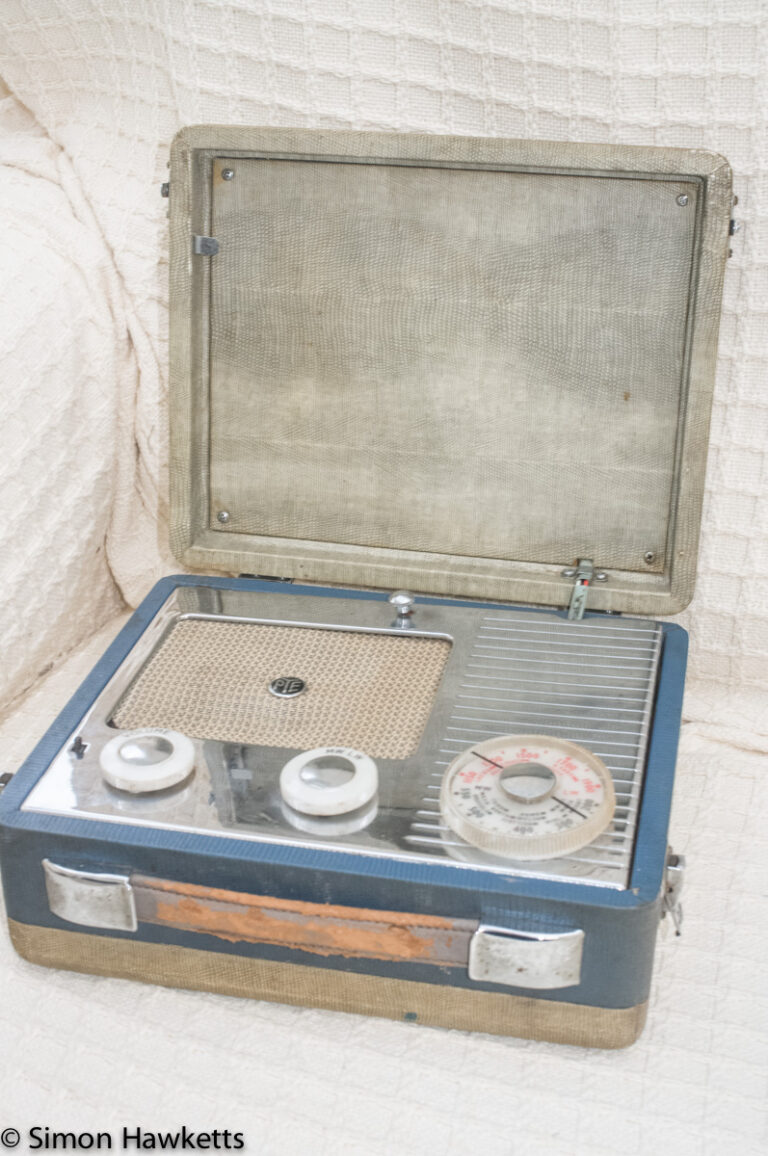
The Nostalgic Grundig TK1 battery tape recorder from 1961
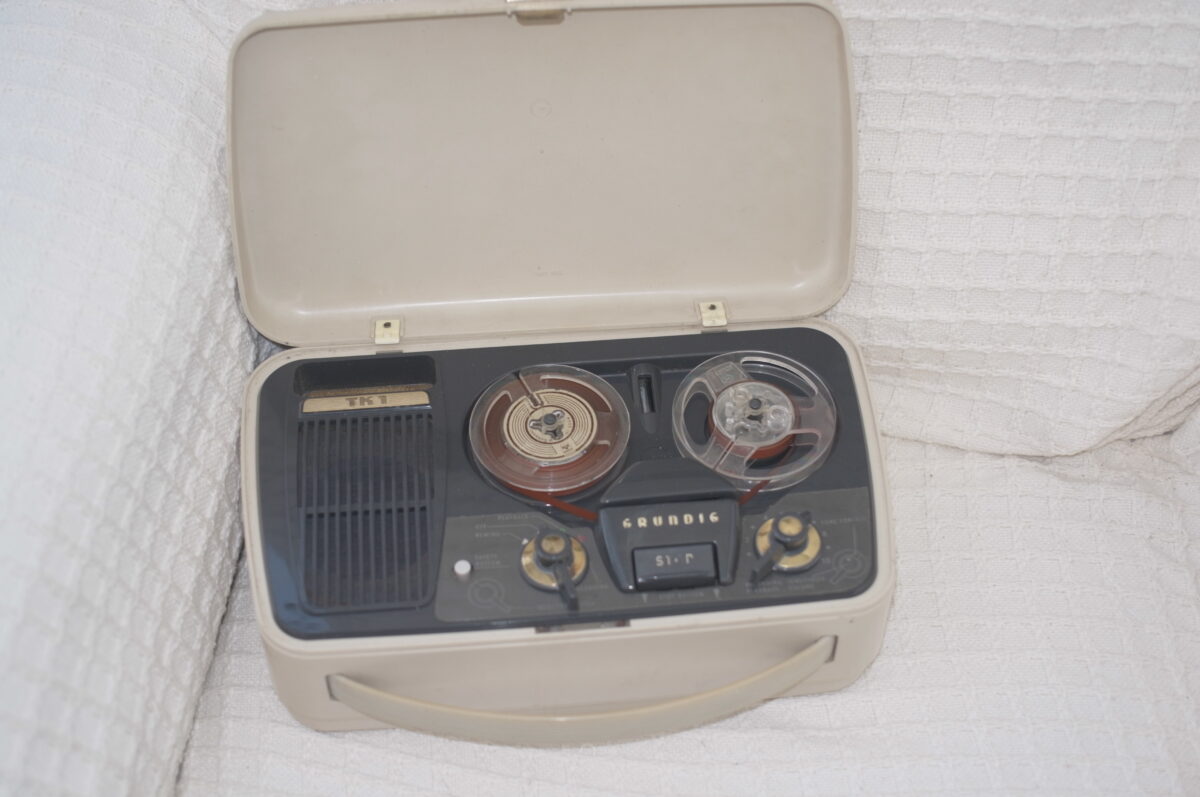
The Grundig TK1 battery tape recorder featured in this article was made in the early 1960s as a good quality, battery recorder which can be easily transported to provide entertainment on the go.
Pictures of the Grundig TK1 Tape Recorder
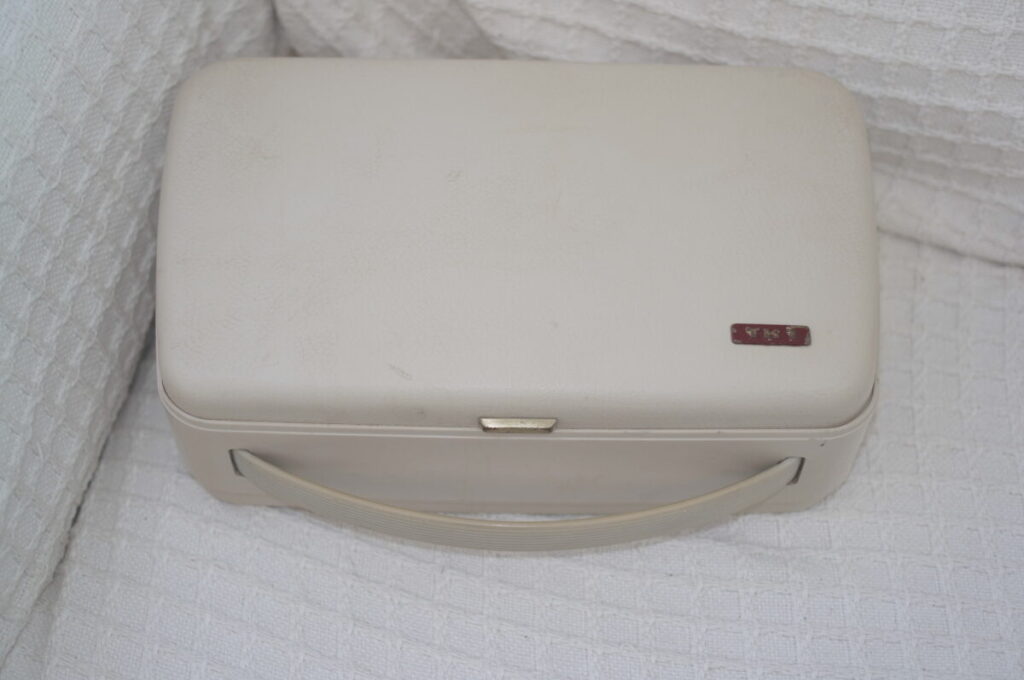
- Grundig TK1 with lid
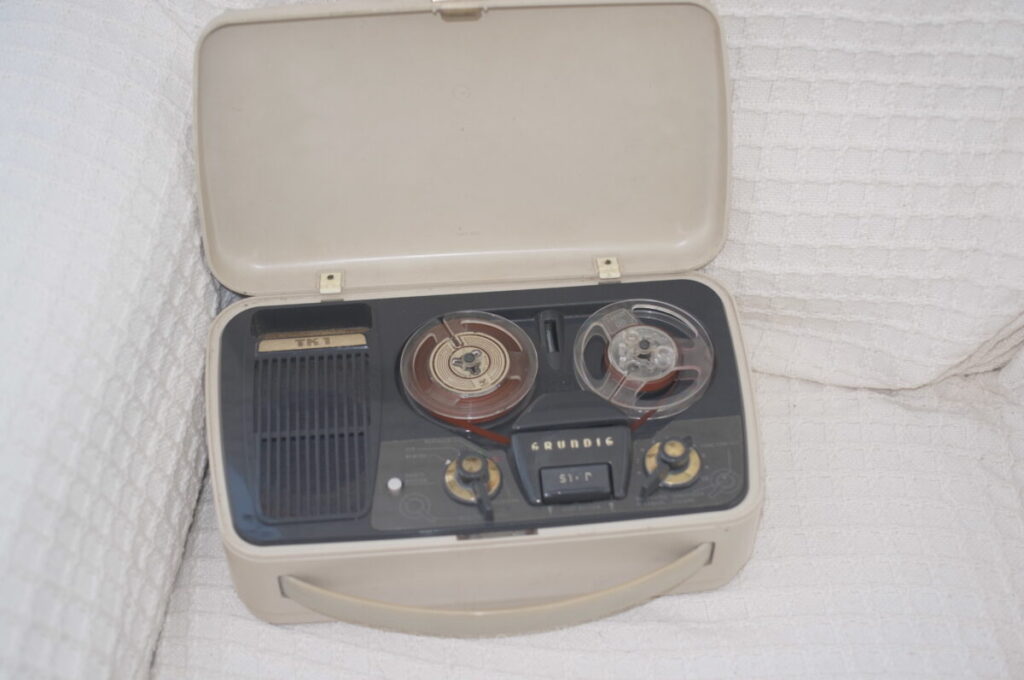
- Lid raised on the tape recorder
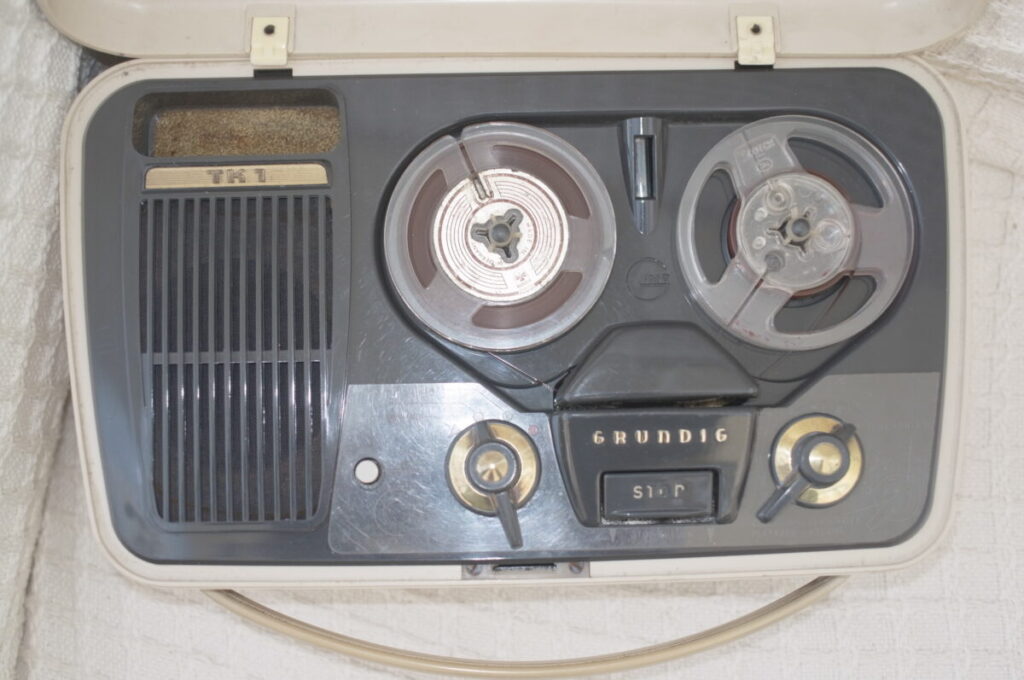
- Close up of the controls
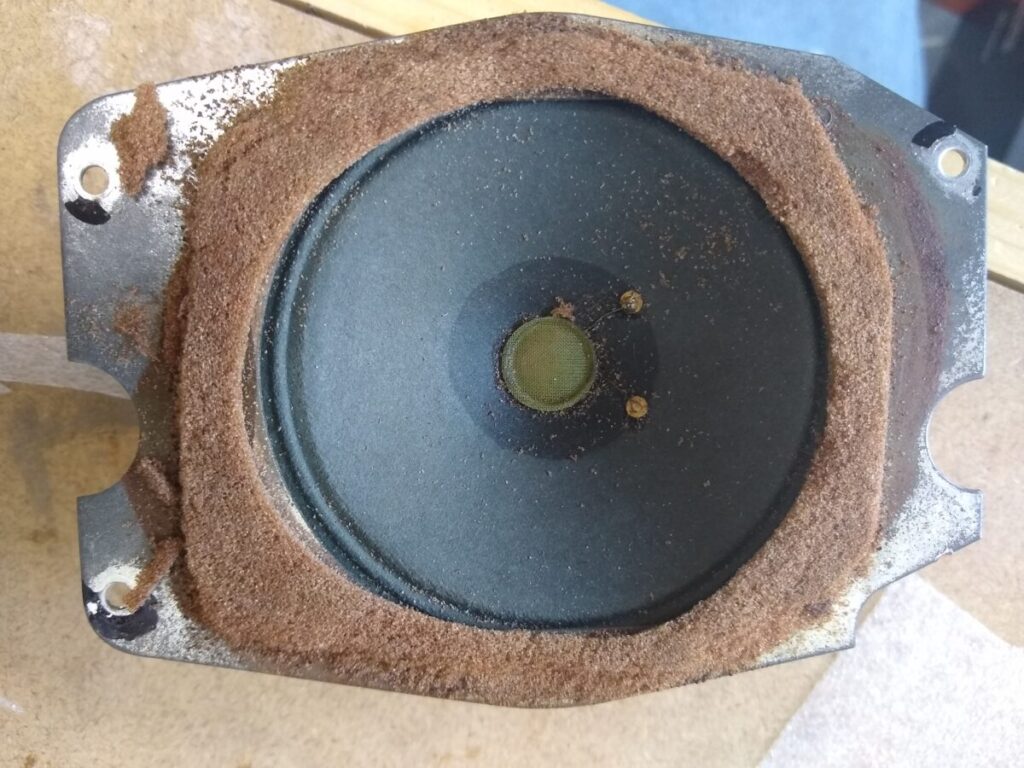
- Old perished seal around the speaker
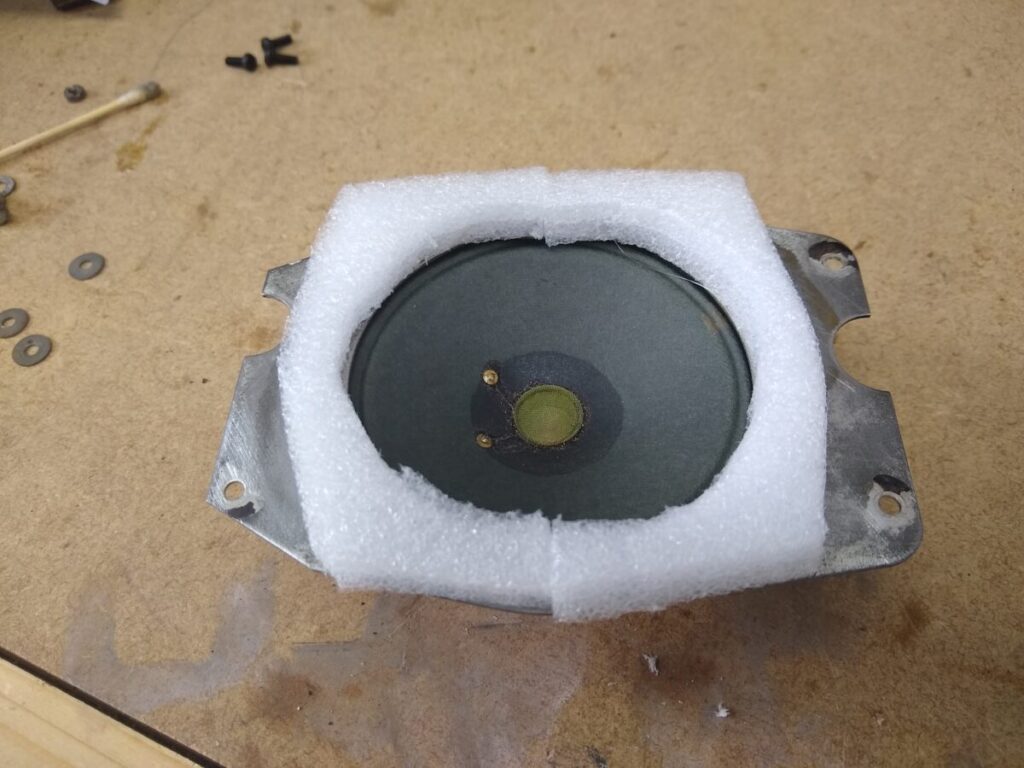
- Replacement foam
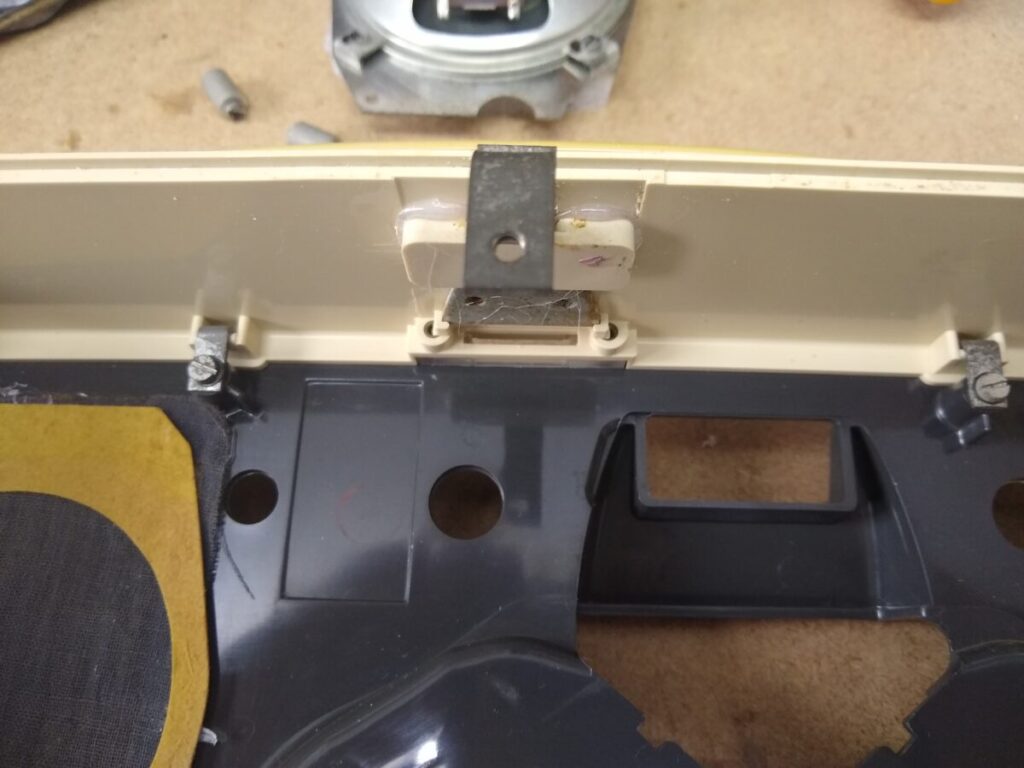
- Lid catch glued to the case
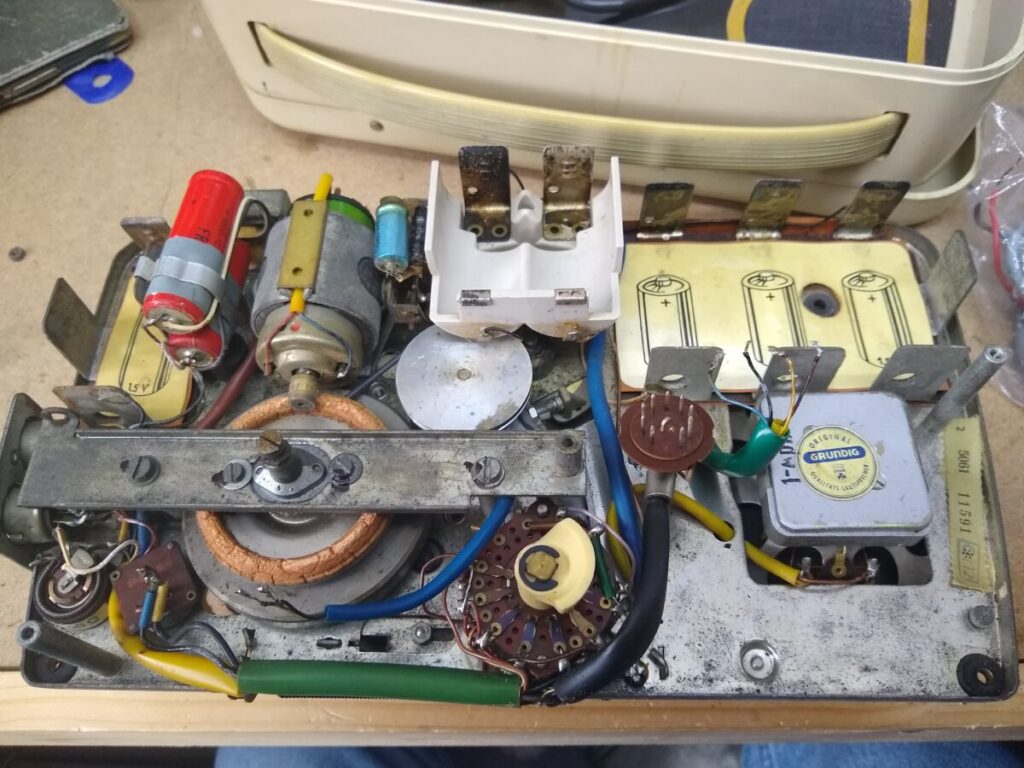
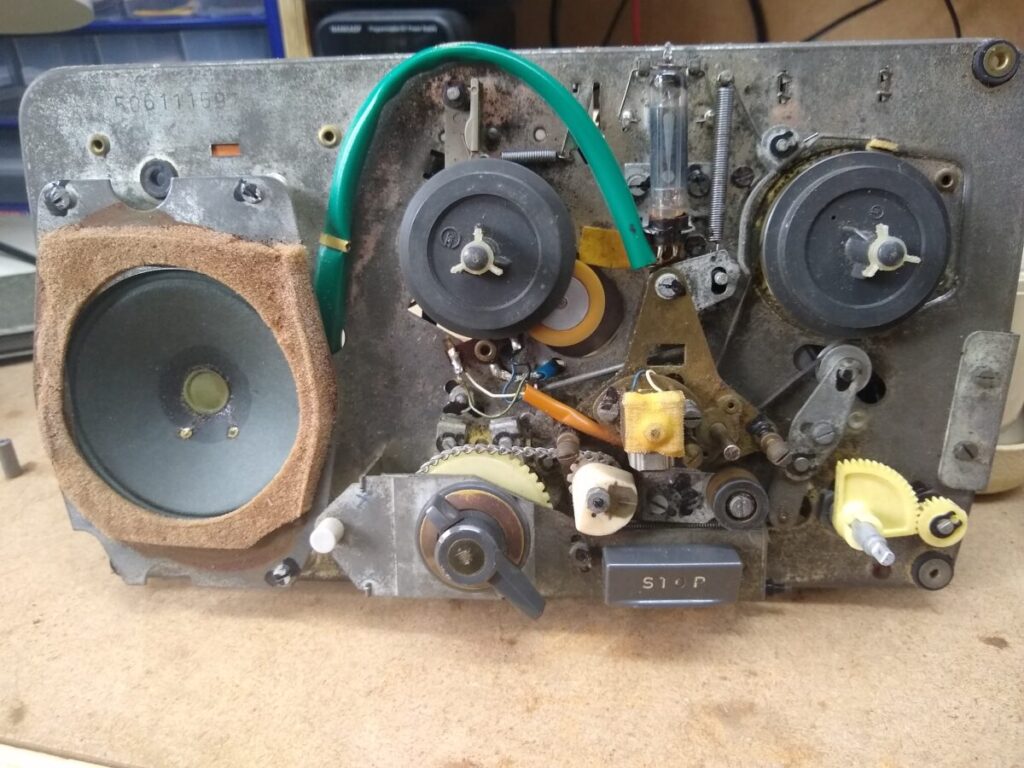
- Main chassis removed from the case
- Front view of the chassis
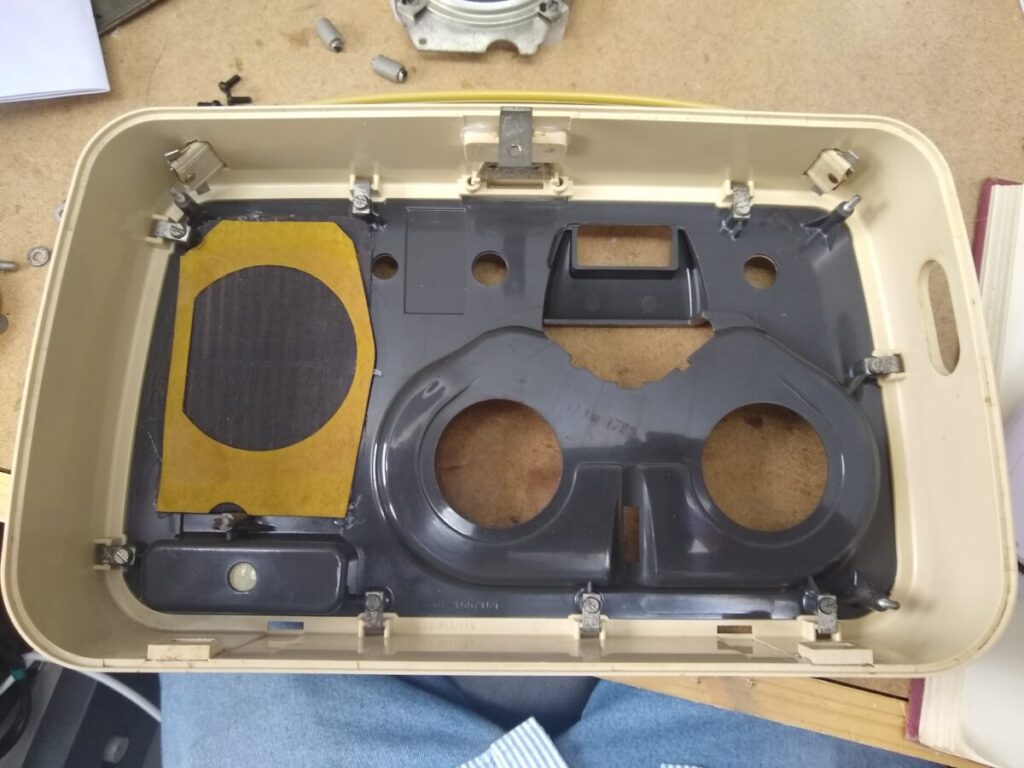
- The case with the chassis removed
My Grundig TK1 Tape Recorder
I bought this Grundig TK1 tape recorder from eBay as an impulse buy because I wanted to see if I could repair and restore it. It’s the second Grundig in my small tape recorder collection, joining a TK18 model I purchased a couple of years ago.
The seller sold the TK1 it as not working; in fact they said that it had stopped working sometime in the 1960s and it had been sitting in storage since then before being sold. The thing that attracted me to it was the fact that cosmetically it looked in good order, the only faults the seller reported were that the clips that hold the bottom case on had become un-glued from the case, and the cover over the recording heads had one broken tab which stopped it being held in place.
Since no one else seemed interested I managed to buy the recorder for only £10 and paid another £6 to have is shipped to me.
When it arrived I found the seller had been accurate and honest in their description. The recorder was a bit grubby, but other than that looked to be exactly as the seller described. They had fortunately included the two broken tabs and the tape head cover in the packaging, so I was pretty hopeful that I could get the recorder looking good again.
Restoration of the Grundig TK1 tape recorder
When I first tried the recorder with some batteries I found that the reels would turn as long as the machine was held upside down or on it’s side.
The cause of this was very easy to find once I took the back cover off the unit and removed the PCB – the rubber drive wheel had dried to the point where it was cracked and brown, and the motor which drives it basically slipped and transmitted no power. The reason it worked on it’s side or upside down was that gravity was giving the motor a helping hand and imparting a bit more drive power.
The video here shows the TK1 struggling to drive the tape.
I tried various methods to fix this issue. First, having removed the old perished rubber ring, I tried using some round section rubber to make a replacement ring, cutting it in half to make a semi-circular profile and then gluing it to the metal plate. This wasn’t at all successful because I couldn’t get the ring to glue without leaving bumps in the surface that caused the tape drive to flutter.
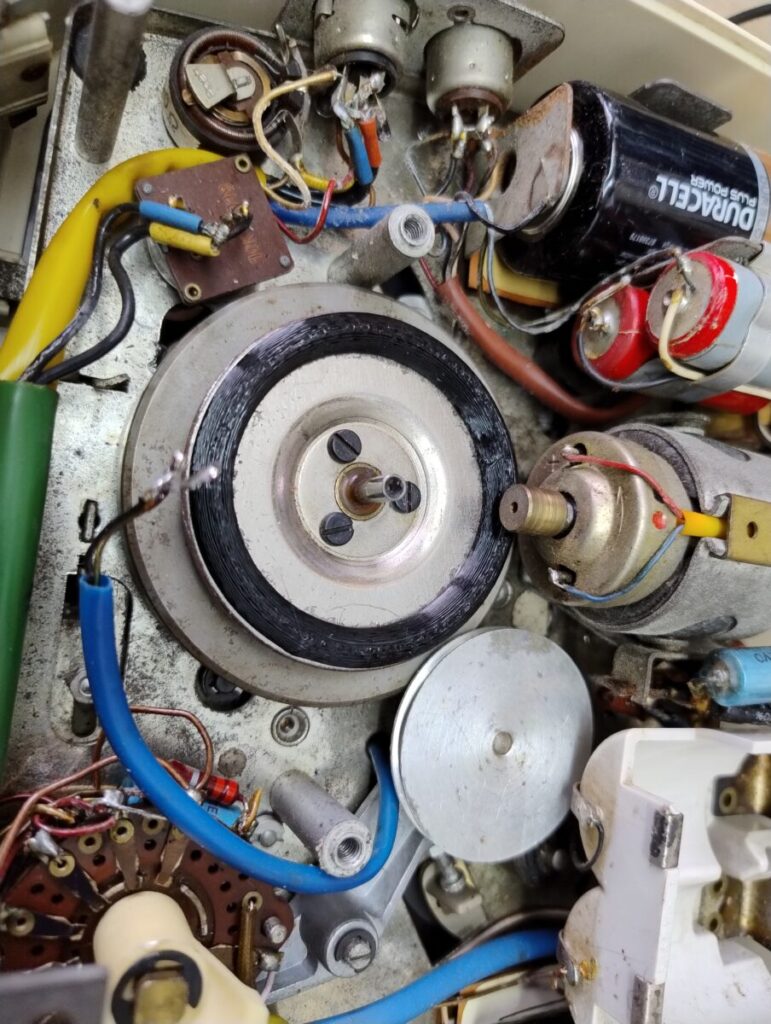
I then tried 3D printing a ring using a TPU filament that is flexible but this also didn’t work because the resulting ring was not flexible enough and didn’t have enough friction to work.
Currently, this is the one remaining issue that I need to fix, but I have a plan that I think will work. I’m going to purchase some silicone rubber and mould a ring to the correct dimensions.
I should be able to 3D print a mould which I can then pour the silicone rubber into to create a ring of the correct size and flexibility, I just need to calculate the correct Shore Hardness for the ring and buy the correct kit1.
Most of the other issues with the TK 1 were cosmetic that could be solved with a good clean and the use of a hot glue gun to replace the broken case parts etc. I found that the foam around the speaker was in a similar distressed state to the drive wheel rubber, and I replaced it with some foam packing that I had in a thin sheet in the workshop.
The unit cleaned up nicely and now looks pretty good considering it’s 65 years old.
Description of the Grundig TK1 battery tape recorder.
The Grundig TK1 was one of the very earliest battery operated tape recorders and was made to provide a recorder for people who wanted to record sound out of the house, or who wanted to take their favourite music with them on trips out.
It is light enough to be carried about, even when fitted with the four C type batteries which drive the motor and the two D type batteries that power the electronics, and could record or playback for about 15 minutes per side of a 3 inch reel of tape.
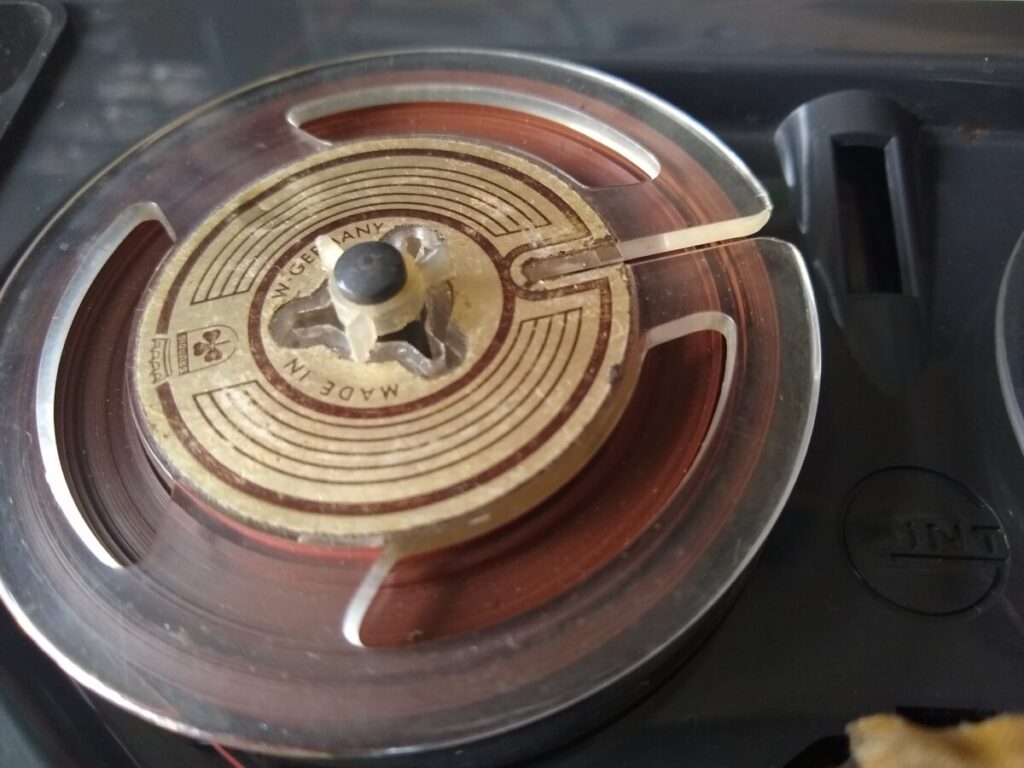
One of the nice features I noticed is that the reel holders have shaped tops which fit the three slots of the tape reel, and can be turned to hold the reel in place if the recorder is held upright.
Although the unit is fully transistorised, there is a single valve of the display indicator type, which is used to set the recording level on the machine. This is shaped like an exclamation point, and is fitted between the two reels. When the unit is in record mode, this valve lights up green to set the input level to the tape recorder.
The unit is of plastic construction and measures about 7 inches by 12 inches and about 4 inches deep.
The operation of the unit is really simple. First, the tape is loaded onto the left reel holder and the tape threaded through the slot in the cover between the two controls and onto an empty reel on the right hand holder.
There are a couple of sockets on the side of the unit with an input/output socket and a connection for an external power supply. To record from a source2, the source is connected to the tape recorder and then the left hand control knob is moved to the record position, which is the most clockwise setting on the control. A small push button has to be pressed to move the knob to the record position, which is a safety control to make sure you don’t accidentally erase something you want to keep.
When the recording is taking place, the small knob on the right hand control is used to set the recording level. It’s important to get this right; too low and the recording is difficult to hear on playback, but too loud and the recording becomes distorted.
To help with setting the level, there is a small green indicator between the two reels which is used to set the level correctly. I remember from the days I used to record the BBC Top twenty program on a Sunday night that setting the level was particularly difficult because you didn’t know the level songs were going to reach as the recording progressed!
Once the recording is complete, the tape can be rewound and then when play is selected, like magic you can hear whatever you recorded played back with the small knob adjusting the volume level and the larger knob setting the tone.
On more sophisticated machines like the TK18 mentioned above you could fast forward through a tape as well as rewind it, but the TK 1 only has a rewind position – probably because the smaller reels meant it was not so necessary to move forward on the tape.
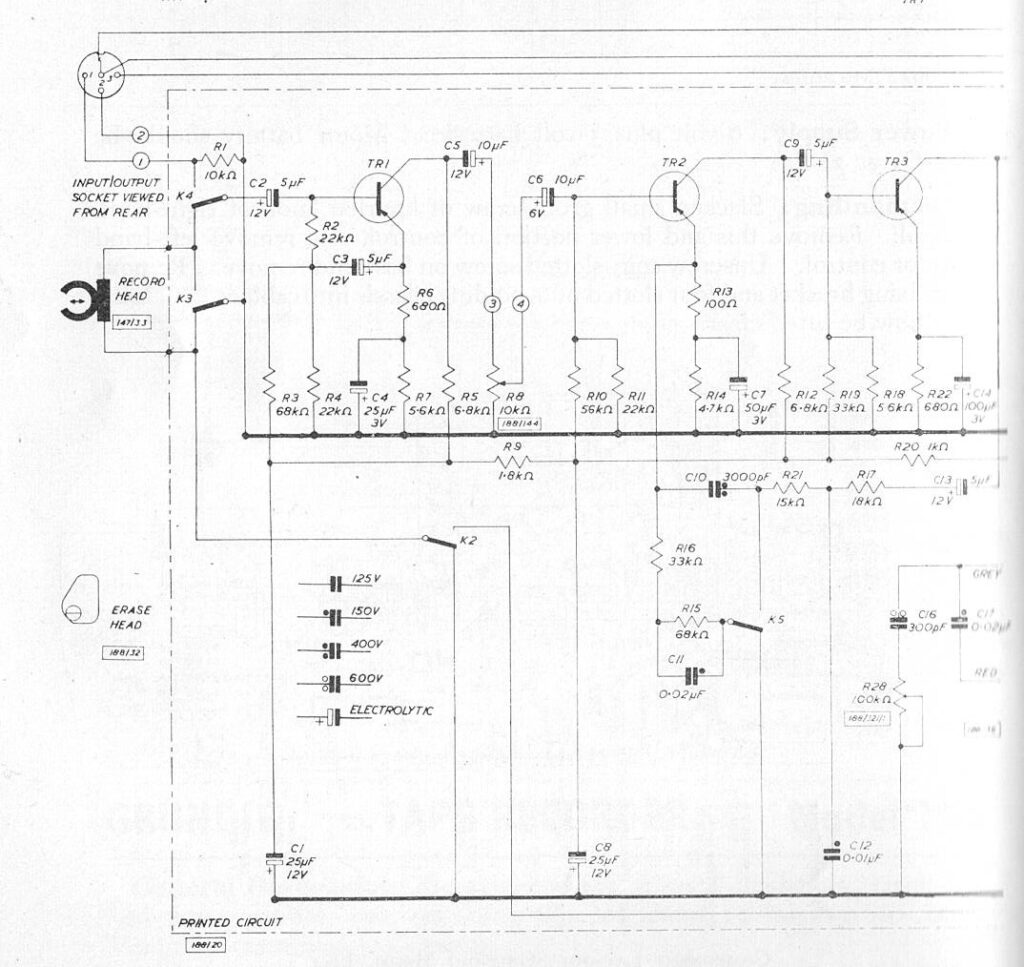
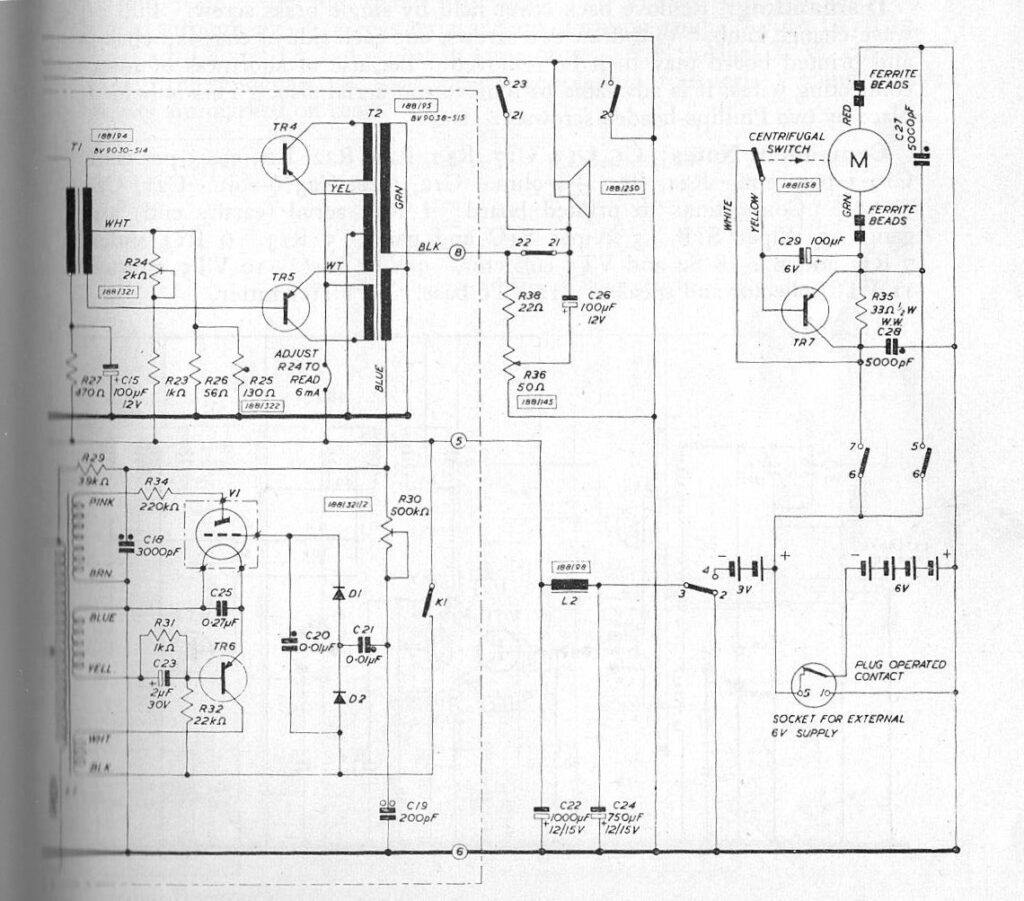
Circuit diagram for the Grundig TK1
I’ve included the circuit of the Tape Recorder for anyone who would find it useful if they want to repair their own example of the unit.
Assuming I get the tape drive issue sorted out, I’ll amend this article to describe any issues with the electronics that I had to deal with.
- I will add an addendum to this article if this proves to be successful [↩]
- which could be a microphone or a connection to a radio or record player [↩]
Discover more from Everything Vintage
Subscribe to get the latest posts sent to your email.

